8 Note Taking Layout Examples Compared
Compare 8 note taking layout examples, from Cornell and outlines to mind maps and Markdown, with use cases, templates, pros, and practical tips.

What should your notes help you do next? A fast lecture may require a format that captures ideas before they disappear. A biology topic may need a visual map of relationships, while an economics lesson may be easier to revise through side-by-side comparisons. A difficult formula may only become useful after you explain it in everyday language.
The best note taking layout depends on that intended work. This comparison looks at eight layouts through four practical questions: how much structure they provide, what kind of review they support, how flexibly they handle words and visuals, and how easily you can turn the finished notes into a course-specific study guide or shareable document. The right choice isn't the prettiest page. It's the structure that helps you capture, understand, retrieve, and reuse the material.
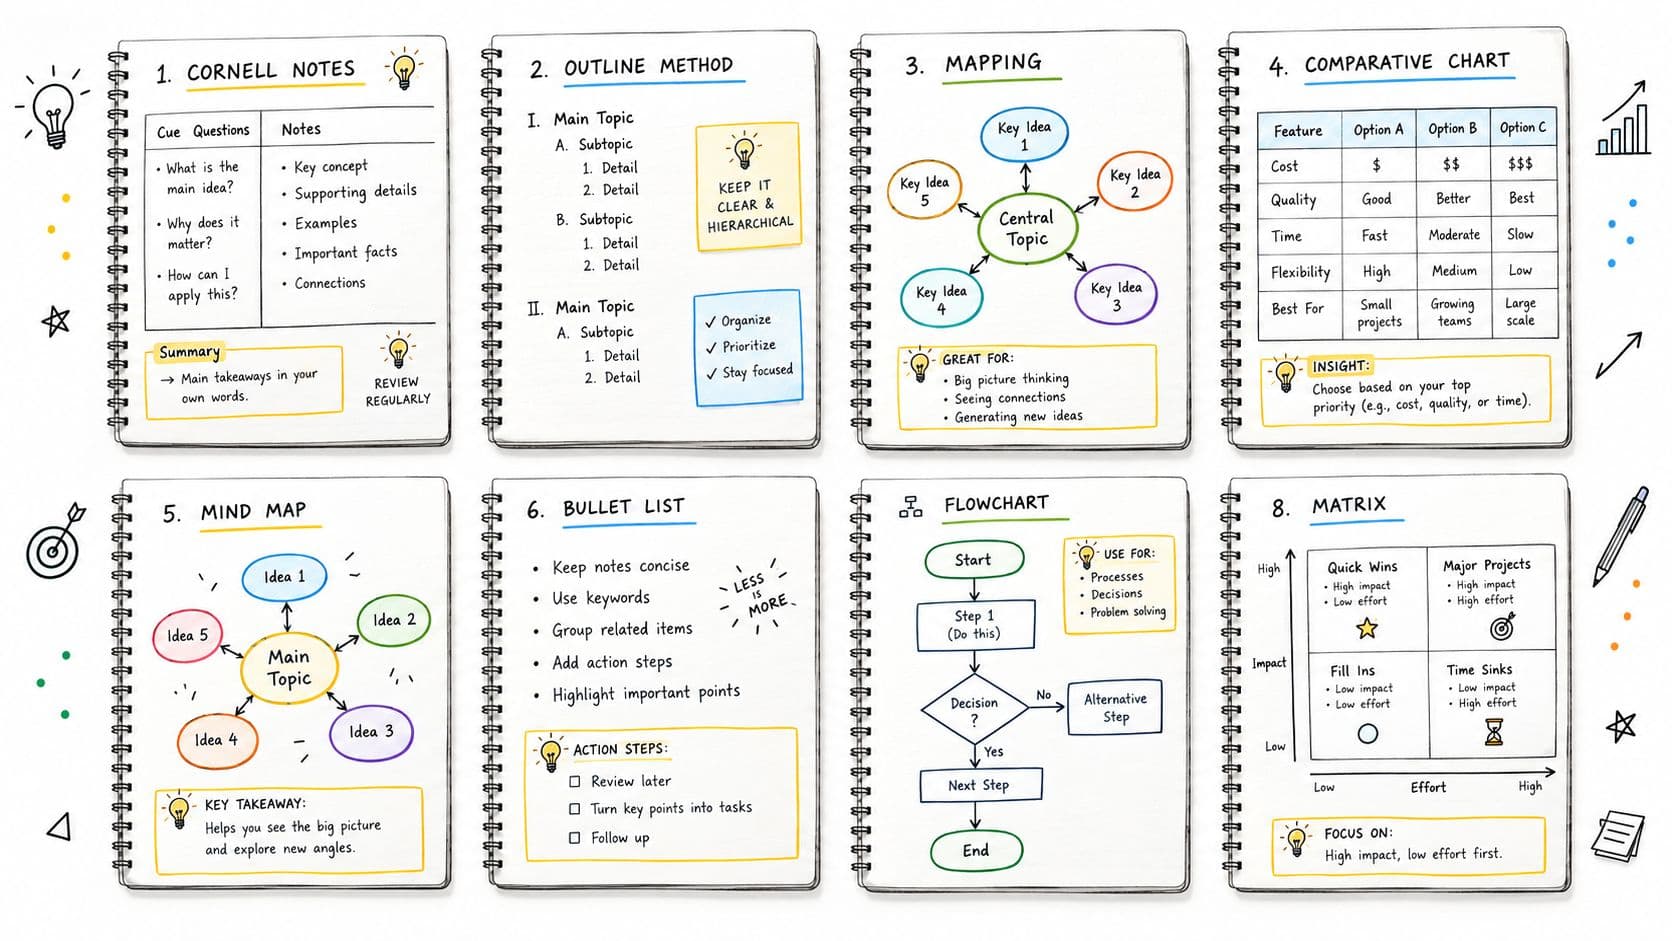
1. Cornell Note-Taking System
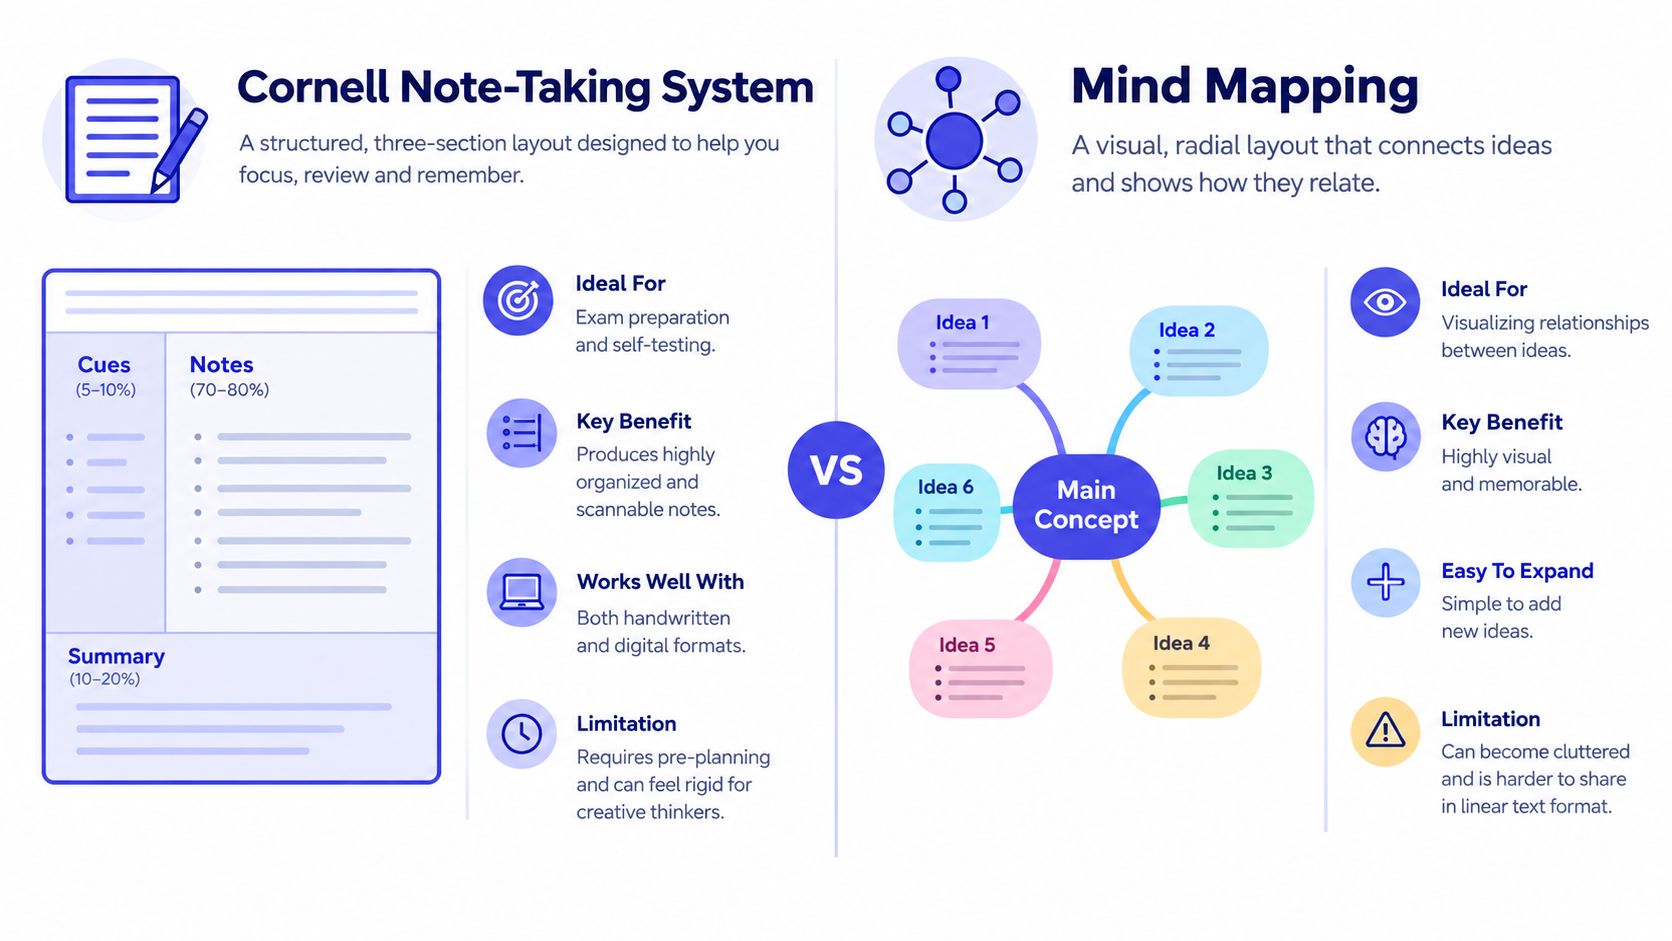
The Cornell system turns a page into three working areas: a wide notes column on the right, a narrower cue column on the left, and a summary area along the bottom. Walter Pauk developed the layout at Cornell University during the 1940s and 1950s, and its three-part structure became widely recognized because it separates recording, cueing, and summarizing in this overview of note-taking methods (opens in a new tab).
During a lecture, use the right side for main explanations, examples, definitions, and diagrams. Leave the left side mostly open. After class, add keywords, questions, or prompts that point back to the detailed notes, then write a short synthesis at the bottom. University guidance commonly recommends making the right column roughly twice as wide as the cue column in its Cornell layout guidance (opens in a new tab).
How to use it for review
Suppose you're studying economics. Your right column might explain how a change in interest rates affects borrowing and investment. The cue column could contain questions such as “What happens to investment?” or “Which assumption matters here?” Cover the right side and answer from the prompts. That turns a passive page into a self-testing resource.
A medical student could use the same structure for anatomy. Detailed lecture notes belong on the right, terms such as “ulna,” “radius,” and “joint movement” belong on the left, and the bottom summary could explain how the structures work together. The layout also adapts well to peer sharing because cues can become study questions and the summary can become the opening paragraph of a revision guide.
Practical rule: Leave the cue column blank while the lecturer is moving quickly. Add retrieval questions when you can think clearly about what matters.
A technical page-budget approach places the cue-to-notes ratio at about 1:2.5–3 and reserves roughly 20%–25% of the writable area for the summary in this Cornell geometry guide (opens in a new tab). Treat those proportions as a starting point, not a rigid rule. A subject with dense explanations may need a wider notes area, while a terminology-heavy course may benefit from more cue space.
2. Mind Mapping Layout
Mind mapping starts with one central concept and grows outward through branches. Instead of forcing information into a sequence, it shows how ideas connect. That makes it useful when the main challenge isn't remembering a list, but seeing the relationships among causes, processes, examples, and consequences.
Start with the lecture or chapter topic in the center. Draw a major branch for each broad theme, then add smaller branches for supporting concepts. Keep labels short. “Predation,” “energy flow,” and “habitat change” will usually work better than full sentences when you're building a map during a biology lesson.
Where the visual structure helps
A biology student could place “ecosystem” in the center, then connect branches for producers, consumers, decomposers, food chains, and environmental pressures. Arrows and short labels can show that one change affects several parts of the system. A history student might connect an event to its political causes, economic conditions, key actors, and later consequences.
Color can separate categories, but it shouldn't become the task. Use one color for definitions, another for examples, and perhaps a symbol for questions that still need clarification. Digital tools such as MindMeister and Coggle make it easier to rearrange branches and export a clean image for a study guide.
A useful workflow is to create an overview map first, then make smaller maps for difficult branches. A psychology overview might connect major cognitive theories, while a later map focuses only on memory models and their differences. This preserves the big picture without forcing every detail onto one crowded page.
The method breaks down when a lecturer presents information rapidly and unpredictably. You may spend too much attention deciding where a new branch belongs. In that situation, capture quick phrases first, then build the map during review.
See the visual difference between a page built for hierarchy and one built for association in this note-taking layout comparison video (opens in a new tab).
3. Outline Note-Taking Method
The outline method supports linear thinking. It places major topics on the left, moves subtopics inward through indentation, and adds supporting details below them. The result resembles the structure of a textbook chapter or a well-organized lecture, which makes it especially useful when a lecturer follows a clear sequence.
Before class, create the course title and lecture heading. During the session, record a main idea at the outer level, place related explanations beneath it, and indent examples or evidence further. Use a consistent system of headings, bullets, and numbering. If the lecturer moves from “contract formation” to “offer,” then “acceptance,” your notes can preserve that hierarchy without requiring a separate redesign later.
A natural route to a study guide
Law students can outline a case by separating the facts, legal issue, rule, reasoning, and decision. Literature students can organize a novel chapter under themes, characters, images, and textual evidence. Engineering students can arrange a procedure into inputs, steps, calculations, checks, and conclusions.
The method works well for formal revision documents because each level already signals importance. You can bold the main principles, highlight terms at the next level, and leave space for examples or corrections. Organizing the file by lecture or chapter also makes it easier to locate a topic before an exam.
For textbook work, pair the outline with a deliberate reading process rather than copying every paragraph. The guidance in this approach to taking notes from a textbook can help you identify headings, concepts, evidence, and questions before you write.
A good outline records the relationship between ideas, not just the order in which you encountered them.
The weakness appears when the content is visual, heavily comparative, or constantly changing. A chemical reaction diagram may fit awkwardly into nested bullets, and a seminar discussion can resist clean hierarchy. Leave blank space for additions, and insert small charts or diagrams when words alone would hide the important relationship.
4. The Boxing Method and Charting Layout
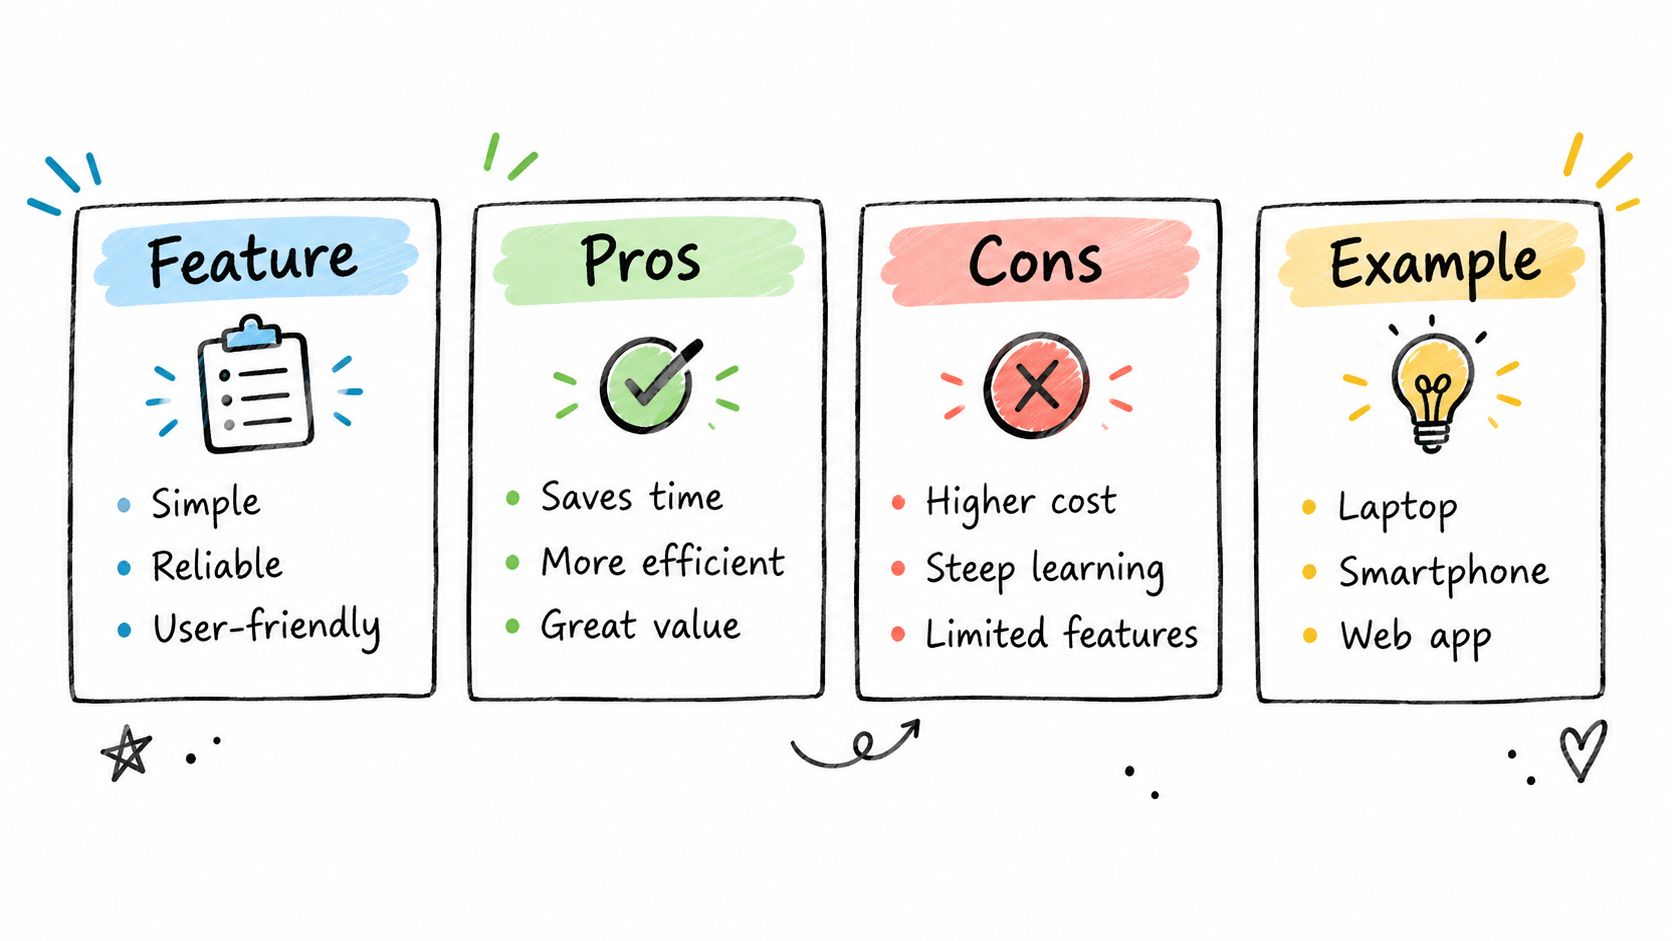
Boxes and tables are built for comparison. They divide the page into bounded sections, each with a clear header and a defined purpose. Unlike an outline, which tells you what comes under what, a charting layout places related categories beside each other so you can inspect differences quickly.
Begin by identifying the categories before class. In chemistry, the columns might be element, properties, common reactions, and safety considerations. In medicine, they could be disease, symptoms, diagnostic clues, treatment, and prognosis. If the categories are stable, fill each box with short phrases rather than paragraphs.
Turn rows into revision prompts
A history student comparing political movements might create rows for causes, leaders, methods, public response, and outcomes. During revision, cover one column and reconstruct it from memory. You can also convert each row into a short question, such as “Which factors explain the movement's growth?” or “How did its methods differ from the alternative?”
Economics students can compare economic systems or theories using consistent categories. That structure exposes gaps quickly. If one row contains several examples but no explanation of assumptions, the imbalance tells you where to review.
Charting fails when the lecture doesn't offer predictable categories. A discussion-based philosophy class may move between arguments, objections, and replies in a way that doesn't fit preplanned columns. In that case, capture the discussion in sentences first and build the comparison table afterward.
Use abbreviations consistently, leave room for additions, and reserve color for category distinctions rather than decoration. When you prepare a shareable document, redraw uneven handwritten boxes as a clean table, add a descriptive title, and identify the course and module clearly. The final resource can serve as a comparison guide, a process reference, or a compact exam review document.
5. The Sentence Method and Narrative Notes
The sentence method is the practical choice when the speaker won't give you a usable structure. Write one concise sentence per idea, move to a new line when the point changes, and number the entries so you can refer back to them later. It favors speed and completeness during capture over visual polish.
Philosophy students may use it to record an argument as it develops. A sentence could state the lecturer's claim, the supporting reason, and the objection that follows. Business students covering a case study can record decisions, evidence, stakeholder concerns, and unresolved questions in the order they arise.
Make fast notes usable later
Start with a small abbreviation system for repeated terms. Use headings when the lecturer changes topic, even if the session doesn't follow a formal plan. Don't try to write every sentence perfectly. Capture the meaning, then clarify unclear references, names, and definitions soon after class.
A social sciences student might write:
- The theory explains behavior through the interaction of institutions and personal incentives.
- The lecturer distinguishes the theory from a model based only on individual choice.
- The example shows how the same policy can produce different outcomes across communities.
Those lines are more useful than a long stream of fragments, but they still preserve the lecture's movement. During review, group related sentences under headings, combine repetitions, and mark claims that need a source or clarification.
Use narrative notes when the content is moving faster than your filing system. Organize them after you've protected the important ideas.
The method breaks down during a technical demonstration that depends on diagrams, symbols, or spatial relationships. Add sketches beside the numbered lines, or transfer the material into a chart or Feynman explanation later. To create a shareable course document, add clear headings, consistent spacing, and a short summary for each topic. The raw capture then becomes a readable lecture resource without pretending that the original session was more orderly than it was.
6. The Feynman Technique Layout
The Feynman layout is less a first-capture format than a review structure for understanding. It asks you to name a concept, explain it in simple language, identify gaps, and then revise the explanation. The page measures your understanding by what you can explain clearly, not by how much terminology you can reproduce.
Start with the concept name at the top. Write an explanation as though you're teaching a younger student who has no specialist vocabulary. Circle or list every point where you use a term you can't define, make a logical jump, or rely on a memorized phrase. Return to the lecture, textbook, or reliable course source to fill those gaps, then rewrite the explanation.
Use it after another layout
A data science student might first record an algorithm in an outline, including its steps and technical assumptions. During review, the Feynman page could explain the algorithm as a method for making a decision from input data, then use a small example to show what happens at each stage. The gap list might reveal confusion about training data, evaluation, or why the method fails in certain conditions.
Medical students can use the approach to explain a physiological process without hiding behind dense vocabulary. Economics students can apply it to abstract principles by stating the mechanism, giving a concrete example, and explaining what would change if a key condition changed.
The technique can expose gaps that polished notes conceal. It also produces accessible study materials because the final version already has a teaching sequence. A peer can read the explanation, identify a remaining confusing passage, and give feedback that guides another revision.
For a wider revision system, connect the finished explanation to spaced repetition tools and review planning. The Feynman page supplies the explanation, while later sessions can test whether you can reproduce it without looking.
Don't force every lecture into this format while the lecturer is speaking. Initial capture needs speed. Use the Feynman layout during a focused review session, then preserve the final explanation as a study guide, glossary entry, or course document.
7. The Two-Page Spread Method
A two-page spread gives each facing page a different job. The left page holds questions, key terms, diagrams, images, or prompts. The right page contains detailed explanations, worked examples, and references. This mirror layout works well when a subject combines visual evidence with verbal analysis.
In mathematics, place a worked problem or the question on the left and the complete solution on the right. During revision, cover the right page and solve from the prompt. In language study, use the left side for vocabulary and the right side for usage examples, grammar notes, and mistakes to avoid.
Pair the prompt with the explanation
Art history students can place an image or visual description on the left, then analyze composition, context, technique, and significance on the right. Science students can draw a labeled organ or process on one side and explain its function, sequence, and exceptions on the other. This arrangement keeps the visual starting point close to the text that interprets it.
Plan the division before writing. If you fill the right page first, you may leave no room for useful prompts. Keep the left page concise enough to support self-testing, and make the right page detailed enough to answer the questions without requiring a second notebook.
The layout can become awkward when one topic needs far more explanation than the facing page can hold. Continue the explanation on the next spread, add a clear reference, or use a digital document with expandable sections. A digital version also makes it easier to insert diagrams, screenshots, and links while preserving the same two-part logic.
For sharing, label each spread with the course, module, topic, and source context. Exporting the pages together can preserve the relationship between the prompt and explanation, but check that images remain legible and that any included material is yours to distribute.
8. Digital Markdown and Structured Text Method
Markdown turns notes into searchable, portable text. Use headings to create hierarchy, bullets for compact points, bold text for important terms, links for related topics, and code blocks for formulas, code, or structured data. The layout is especially useful when your notes need to move between devices, grow over time, or become a polished document.
Create a consistent structure for every course. A computer science note might begin with the module and topic, followed by a plain-language definition, syntax example, explanation, common error, and practice question. A medical reference guide could use headings for condition, mechanism, symptoms, diagnosis, treatment, and unresolved questions.
Build for retrieval and sharing
Searchable keywords matter. Use the official course name, module title, key terms, textbook chapter, and relevant abbreviations so you can find the note later. Add tags or links between related concepts. A data science student might connect a note on data cleaning to notes on missing values, model bias, and evaluation.
Applications such as Notion, Obsidian, and Visual Studio Code support different versions of this workflow. Obsidian emphasizes linked plain-text notes, while Notion provides a more visual workspace. The tool matters less than the rules you keep consistent. Use the same heading hierarchy, naming convention, and metadata fields across the course.
Markdown also separates capture from presentation. You can write quickly in plain text, then export the file into a formatted study guide. The method breaks down when you need freehand diagrams or fast spatial sketches, although you can attach images or combine Markdown with a tablet workflow.
For a practical structure that treats notes as reusable study resources, see this guide to creating effective study notes. Before sharing, remove private comments, verify explanations, identify sources, and check that every image, extract, and example can legally be distributed.
8-Method Note-Taking Layout Comparison
Build a Layout That Supports Your Next Review
Choose the layout by the kind of thinking your next review requires. Cornell notes are a strong fit when you want prompts, summaries, and active recall. Mind maps help when the subject depends on relationships, causes, systems, or inter-topic connections. Outlines suit linear lectures and subjects with clear hierarchies. Charting and boxing make comparisons, categories, and repeated variables easy to scan.
The remaining choices solve different problems. Sentence notes protect information during a fast or unstructured lecture. The Feynman layout turns difficult material into an explanation you can test and improve. Two-page spreads pair visual prompts with detailed analysis. Markdown and structured text support search, links, revision, and cross-platform sharing.
Use this short decision process before class:
- Identify the task: Are you capturing quickly, comparing concepts, tracing relationships, or explaining a difficult idea?
- Choose the minimum structure: Don't build a complicated page if a simple outline will protect the information.
- Reserve review space: Leave room for questions, diagrams, corrections, or a summary.
- Plan the output: Decide whether the notes will become flashcards, a comparison guide, a worked-example sheet, or a course summary.
- Match the medium: Paper may suit freehand maps and spreads, while Markdown may suit searchable reference material.
- Test the result: Close the notes and try to explain, compare, draw, or answer from memory.
The layout is only the first stage. Review soon enough to clarify incomplete terms, label each file by course and module, and separate your own interpretation from copied source material. For academic reading, record enough source information to trace an idea back to its origin. For group sharing, follow your institution's rules on collaboration and academic integrity.
A course-focused library such as CramShare can be useful when you want to find or publish materials matched to a specific university, course code, module, textbook, or academic year. The platform includes free community resources and premium documents with previews, but shared notes should complement your own classes and independent work. Authors should publish only original material they own or have permission to distribute, and students should check copyright and institutional policies before uploading lecture slides, textbook extracts, recordings, or other protected content.
Start with one upcoming lecture. Pick the layout that matches its work, leave deliberate space for review, and convert the finished notes into one resource you can use. Then judge the method by your retrieval questions and explanations, not by how decorative the page looks.
CramShare offers course-specific lecture notes, summaries, revision guides, practice materials, and other study resources organized by university, course code, module, textbook, and academic year. You can preview documents before deciding whether their structure and relevance fit your course, and you can publish original notes as free or paid materials when you have the right to share them. Visit CramShare to find relevant study resources or turn your own well-organized notes into a useful course document.